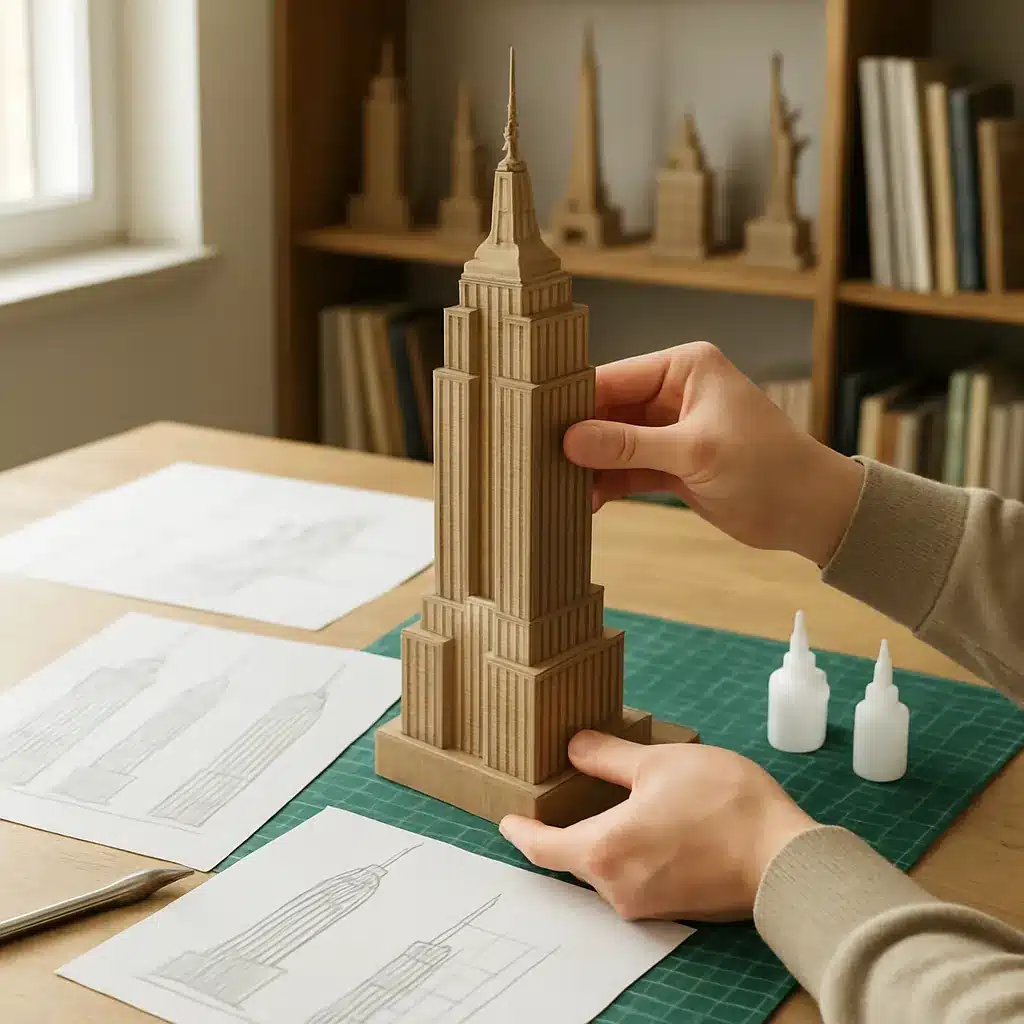
Combining architectural thinking with tactile play, a DIY 3D landmark puzzle is a rewarding project for designers, educators, and hobbyists. Whether you want a tabletop model of a local cathedral, a skyline section, or a stylized version of a famous skyscraper, the process trains spatial reasoning and design simplification while producing a beautiful object. This practical guide walks you from initial research to a finished prototype.
Choose a suitable landmark and define scope
Not every building makes an easy puzzle. Start by choosing a landmark whose key forms can be reduced to a few interlocking volumes. Consider:
- Recognizability: Iconic silhouette or distinct massing helps the finished model read well at a small scale.
- Complexity: For your first model, pick something with clear primary volumes (towers, dome, rectangular wings) rather than intricate ornamentation.
- Scale and size: Decide tabletop footprint and overall height—this affects how many pieces you’ll design.
Examples that translate well to puzzle models: a cathedral with a central nave and twin towers, a simplified Beaux-Arts civic building, or a modernist tower with setbacks.
Gather reference and make quick orthographic sketches
Collect photos and, if available, elevation drawings. You’ll need front, side, and plan views to interpret true proportions. If architectural drawings aren’t available, use photos to infer major dimensions and relationships.
- Sketch the building as three views: plan (roof outline), front elevation, and side elevation.
- Mark important datum lines—floor levels, cornices, roof ridges—these will guide where pieces meet.
- Decide which elements will be separate puzzle pieces (e.g., base plinth, central block, tower, dome).
Simplify shapes and create a block model
Reduce ornamentation to primary geometry. The goal is a stylized but recognizable object that assembles logically.
- Convert complex façades into extruded planes and simple volumes.
- Ensure each piece has a sensible center of gravity so the assembled model is stable.
- Use symmetry where available to reduce unique pieces and ease assembly.
Design interlocks and tabs for stable assembly
Interlocks turn separate volumes into a coherent structure. Consider three common approaches:
- Butt-and-slot: Vertical slots that allow walls or towers to slide into a base plate. Good for rigid materials like 2–3 mm plywood or foamboard.
- Tab-and-socket: Tabs on one piece that insert into correspondingly sized sockets. Useful when pieces meet at different angles.
- Mortise-and-tenon-style: Miniature versions of joinery for heavier materials or models intended for repeated assembly.
Key design tips:
- Make slots slightly wider than the material thickness (about 0.1–0.3 mm) to account for cutting tolerance and ease of assembly.
- Place locking features low enough to support higher pieces and prevent tipping.
- Design some friction fits and some looser fits to help the assembler orient pieces without forcing every joint.
Choose materials and tools
Material choice affects look, durability, and the required tools.
- Cardstock or chipboard (0.8–2 mm): Cheap, easy to cut by hand or laser, suitable for small models.
- Foamboard or foamcore: Lightweight and cheap, good for larger pieces but needs careful edge finishing.
- Basswood or plywood (1–3 mm): Durable and pleasant to paint, requires a precision cutter or laser.
- 3D printing resin/PLA: Allows complex forms and built-in internal joints but requires CAD modeling and post-processing.
Basic tools: cutting mat, craft knife, steel ruler, pencil, glue (PVA or wood glue), sandpaper, and clamps or weights for drying. For digital workflows, use vector tools for 2D cut files or a simple CAD program for 3D parts.
Prototype: iterate quickly and test assembly
Build a cheap prototype before final cuts. Use plain cardstock to verify proportions and test how pieces fit together. Look for:
- Gaps or overly tight joints.
- Pieces that feel unstable or create torque on other parts.
- Visual clutter—too many small parts may reduce the landmark’s legibility.
Adjust slot widths, tab sizes, and the sequence of assembly. Keep notes on each change so you don’t repeat mistakes.
Finishing, color, and instructions
Finishing elevates the puzzle from craft to display object. Consider these approaches:
- Paint and washes: Use a base coat and selective washes to suggest stone or metal textures instead of recreating every detail.
- Printed facades: For cardstock puzzles, print façade textures before cutting for crisp details.
- Base and plaque: Add a simple baseplate with recessed slots for the pieces and a small label identifying the landmark.
Create a concise instruction sheet that includes a short assembly sequence and an exploded view. A clear order improves the user experience and reduces frustration.
Educational uses and spatial reasoning benefits
3D landmark puzzles are powerful tools for teaching architecture and spatial skills. They help learners:
- Understand orthographic projection and how plan, elevation, and section relate.
- Practice mental rotation and part-whole reasoning while assembling.
- Explore historical and cultural narratives by discussing why a building looks the way it does.
For classrooms, provide scaled drawings and challenge students to redesign pieces for different difficulty levels.
Troubleshooting common issues
- Pieces too tight: Sand or pare down tabs slightly; increase slot width in the design for future cuts.
- Unstable assembly: Add a keyed baseplate or redistribute mass by thickening the lower pieces.
- Loss of detail: Focus on silhouette and primary planes rather than small decorative elements—recognizability matters more than ornament.
Final thoughts
Designing a DIY 3D landmark puzzle blends the rigour of architectural thinking with hands-on making. Start simple, prototype quickly, and iterate until the pieces both fit and read as a building. The result is not just a model: it’s a small, tangible lesson in spatial reasoning and design history that you can assemble, disassemble, and share.