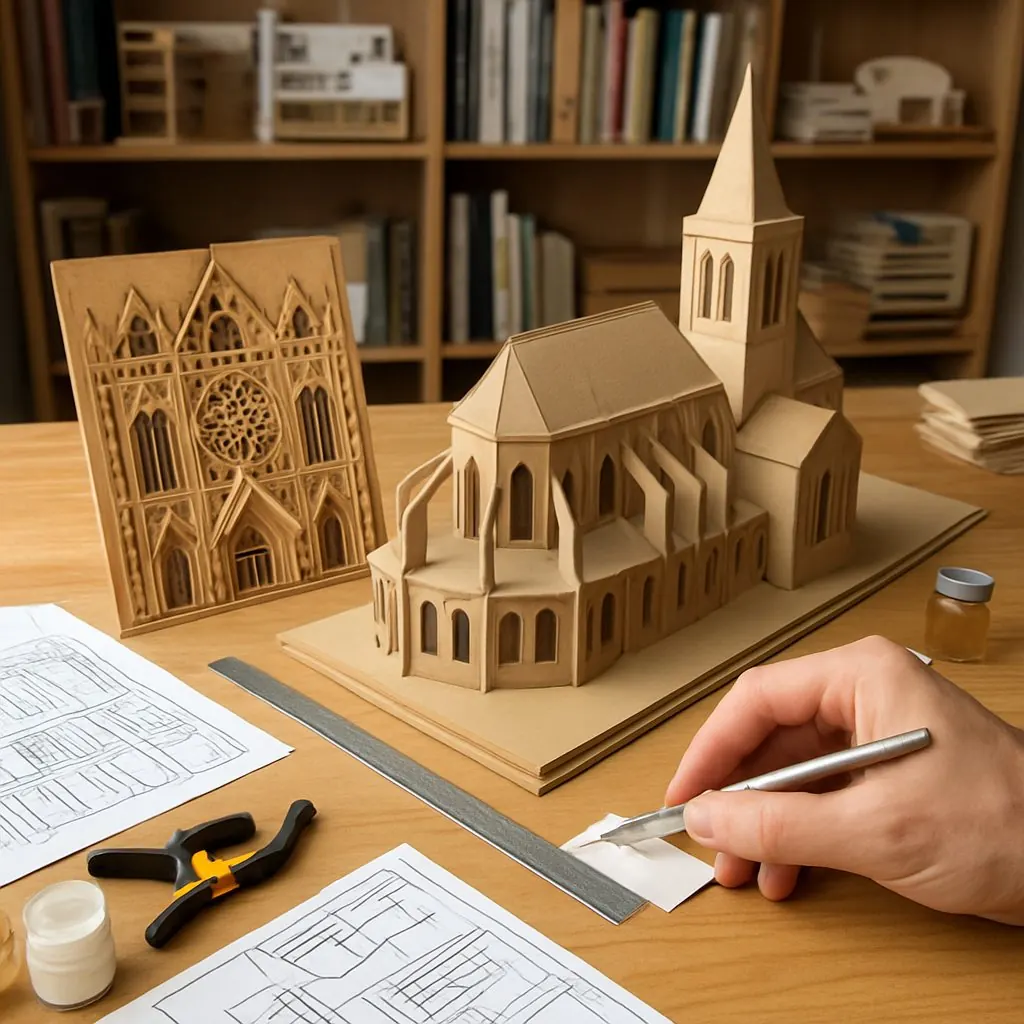
Building a 3D landmark model is part craft, part pattern puzzle and wholly rewarding: you translate a building’s silhouette and structure into planes, joints, and surface detail. This guide walks a maker through planning, patterning, material choices, cutting and assembly techniques, and finishing options so you can build a small-scale landmark (we use a “mini-cathedral” as the sample). The methods scale from quick paper mockups to durable laser-cut wood or foam-core models.
1. Plan the model: scale, silhouette, and structure
Start with intent. Decide whether the model is a display piece, a playable puzzle, or a lightweight study model. That determines scale, materials, and internal structure.
- Choose a scale: For tabletop models, 1:200–1:500 works for city skylines; for single-building study models, 1:50–1:200 lets you show facade detail.
- Prioritize silhouette: A good landmark model reads at a distance. Reduce the building to primary masses (towers, nave, base) before adding ornament.
- Decide internal support: Large roofs or tall towers need internal ribs, tabs, or a simple armature of foam-core or balsa wood.
If you also design jigsaw-style assemblies, many of these choices echo considerations in puzzle layout and piece silhouette; see design considerations shared with jigsaw puzzles.
2. Materials and tools — pick the right medium
Common approaches:
- Paper / Cardstock: Cheap, good for initial patterns and ornament detail. Use 200–300 gsm for stability.
- Corrugated cardboard: Readily available, great for blocky massing and cheap armatures.
- Foam-core / Foam board: Lightweight, easy to cut, ideal for internal structure and planar facades.
- Laser-cut plywood / MDF: Durable and precise for clean edges; good for finished display models.
For detailed discussion of suppliers, material pros/cons, and printing/laser-cutting workflows, check recommended materials and printing processes.
Basic tools list:
- Sharp craft knife and spare blades
- Metal ruler and cutting mat
- Scoring tool (bone folder or blunt knife)
- White PVA glue and a stronger wood glue (if using wood)
- Pins/clamps/small clothespins
- Sandpaper (120–320 grit), files
- Paints, primers, and clear coats for finishing
3. Patterning: measure, simplify, and lay out parts
Patterning is the most important step. You can do it by hand or in a CAD/vector program (Inkscape, Illustrator) to export PDFs/SVGs for printing or laser cutting.
- Photograph and measure: Use orthographic photos or plans when possible. Measure primary heights, widths, and repeating module sizes (windows, bays).
- Simplify geometry: Turn complex surfaces into a set of planes. For a cathedral: base, nave, transept, towers, spire segments, roof planes.
- Create tabs and slots: Add 3–5 mm tabs for paper/cardboard; 1–2 mm kerf compensation for laser-cut wood slots. Test-fit on a mockup before final cutting.
- Export templates: Create a cut file with labels for orientation, fold lines (dashed), and glue tabs.
We provide downloadable sample templates for the mini-cathedral in SVG and printable PDF formats. Look for the project ZIP on this page (includes: mini-cathedral-template.svg, mini-cathedral-fold.pdf, and a parts map).
4. Cutting, scoring, and test-fitting
- Paper/cardstock: Score fold lines lightly before folding to keep crisp edges.
- Cardboard and foam-core: Multiple light passes with a sharp blade prevent ragged edges. Use a fresh blade for foam-core to avoid tearing the paper facings.
- Laser-cut wood: Include registration marks and a clear parts map. Account for kerf (typically 0.1–0.2 mm depending on wood and laser).
- Dry-assembly: Always test-fit without glue to ensure tabs align and tolerances work.
5. Assembly techniques
- Work from the inside out: Install internal ribs, supports, or a simple base first so external pieces have something to align to.
- Glue strategy: Apply glue sparingly to tabs. For paper and cardboard, PVA dries clear and is forgiving. For wood, use wood glue and clamp while curing.
- Hold and align: Use pins or clamps on corners and allow set time before moving to adjacent parts.
- Layered detail: Add facade details after the primary mass is stable. Thin paper or veneer is ideal for small details applied to a rigid base.
6. Finishing and weathering
Priming and painting unify the model. For paper/cardboard, use a thin spray primer to avoid warping. For wood, sand joints smooth, then prime. Consider ink washes or dry-brushing to reveal texture and depth.
- Apply a matte clear coat to protect paper/cardboard models.
- Use small brushes for architectural details and stencils for repetitive patterns like windows.
- For outdoor or robust display pieces, seal with polyurethane or an appropriate exterior finish.
7. Variations, scaling up, and display
Scale up by increasing the thickness of internal ribs and choosing sturdier materials (plywood, MDF). For multi-piece, transportable models, design the base into removable sections with keyed joints.
For inspiration and examples of maker approaches and finished models, see our maker gallery at maker spotlights and finished project photos. Studying how others resolved joints and finishes helps refine your technique.
Troubleshooting quick tips
- If corners misalign: sand mating edges lightly and re-tab with a thin shim.
- Warping after glue: clamp flat against a board until fully dry.
- Too-detailed piece fails repeatedly: scale detail up slightly or make it a separate appliqué.
Next steps and resources
Begin with a paper mockup of the mini-cathedral template, then move to cardboard or foam-core for the final model. If you want to adapt these patterns into a puzzle-style assembly, revisit the overlapping choices between jigsaws and interlocking parts in that design guide. For materials and fabrication workflows, consult our materials guide.
Download the sample templates (SVG and PDF) included with this article to get started. Share your finished models and techniques in our community gallery to inspire other makers.