Why this gallery
This gallery brings together finished architecture-themed puzzles and 3D landmark models from independent makers and small studios. Each entry includes production notes, materials, and a brief maker interview so you can see how ideas move from sketch to finished piece. Whether you collect detailed jigsaws or want hands-on inspiration for your next build, these projects highlight techniques that work and the trade-offs designers face.
Featured projects
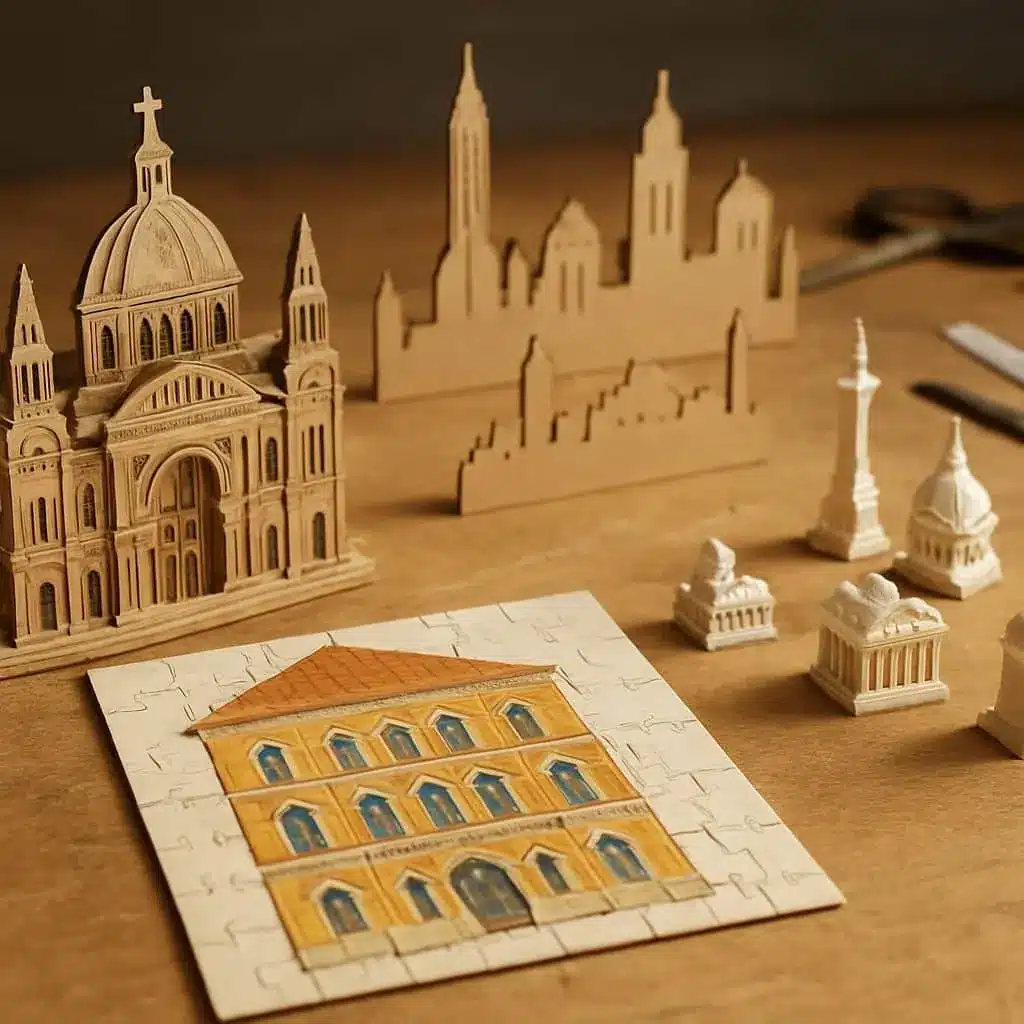
Florence Duomo Relief Puzzle — layered cardboard, large-format
Designer: Lena M.
Piece count: 300 layered pieces (5 depth planes)
Materials: archival cardboard, water-based inks, foam backing for relief effect
Production notes:
- Photography: taken under even light to preserve facade detail; final print split into five layers to give depth.
- Assembly challenge: aligning relief layers required registration tabs and a light clamp jig made from MDF.
- Finish: clear matte varnish to reduce glare while preserving color fidelity.
Maker note: “Splitting the photograph into depth planes made the assembly slower but the result reads as a miniature façade. We recommend practicing on a single panel first to tune registration.”
New York Skyline — laser-cut plywood 3D model
Studio: Corner & Beam
Scale: 1:2500 skyline strip, interlocking modules
Materials: birch plywood (3mm and 6mm), wood stain, laser engraving
Production notes:
- Design workflow: vector outlines traced from orthographic photos, simplified to essential silhouettes for readability at small scale.
- Construction: layered beds glued with alignment pins; tall elements reinforced with thin brass rods to resist warping.
- Unique solution: they used staggered tabs so modules can be rearranged to represent different districts.
Designer quote: “We wanted a piece that works as both a puzzle and a display object—each module is satisfying to slot into place and stable on the shelf.”
Barcelona Facade Puzzle — hand-cut mixed-media
Maker: Tomas V.
Piece count: 420 pieces with several custom-shaped motif pieces
Materials: thick board, hand-painted accents, gold foil highlights
Production notes:
- Technique: after laser outlining, some pieces were finished by hand for texture continuity across the mosaic motifs.
- Challenge: matching painted color fields across adjacent pieces; solution was to work with continuous panels then cut to maintain brush strokes.
Interview snippet: “The tactile inconsistency of some commercial puzzles bothered me, so I learned to paint across sheets before cutting. It costs more time but people notice the difference.”
Miniature Parliament — 3D-printed landmark kit
Maker: independent maker collective (modular kit)
Scale: tabletop (approx. 1:600)
Materials: PLA filament, clear acrylic base, magnetic alignment pins
Production notes:
- Print strategy: parts oriented to avoid excessive supports; ornamental details printed at higher resolution and glued into recesses.
- Assembly: magnetic pins embedded in base for repeatable positioning; instructions include painting guide and recommended brush sizes.
Practical tip: if you plan to replicate a small 3D-printed landmark, see our step-by-step 3D model guide for slicing settings, recommended infill, and finishing techniques.
Common maker techniques highlighted
- Layered depth: splitting photo references into planes to create architectural reliefs that read from multiple angles.
- Modular design: designing skyline strips or modular blocks so the final piece can be rearranged or expanded.
- Mixed finishing: combining digital cutting with hand-painted details for tactile richness and visual accuracy.
- Mechanical solutions: integrated magnets, alignment pins, and jigs to simplify gluing and registration during assembly.
Buying vs. making
If you prefer to collect rather than fabricate, these projects have close commercial parallels. For curated options and vetted sellers, consult our guide to where to purchase similar pieces. If you want to plan a project with landmarks that photograph and assemble well, start with our recommendations for landmarks that photograph and assemble well.
Short interviews: lessons from makers
Lena M. — “Start with an honest mockup. A small test panel saves time and material when you’re committing to registration strategies.”
Corner & Beam — “Simplification is a design decision. Too much silhouette detail becomes noise at small scales; choose elements that read from a distance.”
Tomas V. — “People engage with texture. Hand-finishing makes a product feel cared for and increases perceived value, even for modest editions.”
How to use this gallery
Use these projects as starting points: copy a joining strategy, adapt a finishing tip, or select a reference photograph and scale it for a new puzzle edition. Makers can follow the project notes for material suggestions and pitfalls to avoid. Collectors can use the buying guide link above to find similar finished works.
Want more hands-on guidance? The linked tutorials and buying resources will help you move from inspiration to build or purchase. If you’d like to be featured in a future gallery, send a high-res photo and a brief maker note describing materials and production hurdles—showing both the finished object and an in-progress shot is especially helpful for other makers.