Making a custom skyline puzzle from photos is a rewarding project that blends photography, design, and hands-on making. Whether you want a keepsake of a trip, a unique gift, or an architectural statement piece, this guide takes you from image selection and editing to cutting, finishing, and packaging a finished puzzle you can actually assemble.
Overview and project scope
This tutorial covers: selecting the right photo, preparing the image for print, choosing a substrate and print method, laying out a piece pattern, cutting options (home tools and small-shop setups), finishing, and packaging. Read through all steps before starting so you can plan time and materials.
Materials and tools (basic and optional)
Core materials:
- High-resolution photo of the skyline (RAW or large JPEG)
- Substrate: foamboard, chipboard, mdf, or pre-made puzzle blanks
- Adhesive for bonding print to substrate (spray adhesive or archival glue)
- Clear matte or satin varnish or laminate for protection
- Cutting tool: craft knife, scroll saw, or access to a laser cutter/CNC
- Cutting mat, ruler, clamps (if using saw), and safety gear (gloves, goggles)
Optional but useful:
- Quality printer or print shop for color-accurate large-format prints
- Spray mount or rubber roller for even adhesion
- Fine-grit sandpaper for edge cleanup
- Corner protectors, custom box, or tin for packaging
For substrate and print specifics see recommended materials and print tips.
Step 1 — Choosing and editing your photo
- Pick the right composition. Choose an image with a clear skyline horizon and strong silhouette contrasts—good contrast helps pieces resolve during assembly. If you want inspiration on recognizable compositions, see inspiration from famous skylines.
- Crop to a finished aspect ratio. Decide the puzzle shape early (rectangular panorama is common for skylines). Crop the image to the final dimensions in your editor to avoid surprises later.
- Enhance contrast and clarity. Boost local contrast slightly and sharpen edges so architectural forms remain crisp when printed. Avoid excessive HDR effects that create unnatural edges.
- Consider converting to high-contrast black-and-white. This can produce a striking, challenging puzzle that emphasizes form over color.
Step 2 — Preparing the print file
Decide puzzle size and resolution—300 DPI at the final print size is a good target. Flatten layers and embed color profile for color consistency at the print shop or printer.
- Add a 3–5 mm bleed if the image will extend to the edge of the puzzle.
- Include a faint registration or guide layer (kept on a hidden layer) if you plan to align the print precisely to the substrate during lamination.
Step 3 — Mounting and sealing the print
- Trim the print to the substrate dimensions after printing.
- Apply spray adhesive evenly to the back of the print and to the substrate, or use a roller for even pressure. Work in a dust-free area to avoid trapped particles.
- Align carefully and press with a rubber roller or hand pressure, smoothing out bubbles from the center outward.
- Seal the printed surface with a clear matte varnish or pressure-sensitive laminate to protect from wear. Allow full cure time per product instructions.
Step 4 — Planning the piece layout
Puzzles of architectural subjects benefit from a layout that balances skyline silhouette pieces with sky and water fields. For help deciding on interlocking styles and piece-level difficulty, consult composition and piece-layout techniques.
Simple approaches:
- Grid pattern with irregular tabs: easiest to cut by hand.
- Organic skyline silhouette cut: more challenging, visually distinct top edge.
- Mixed fields: larger pieces in uniform sky areas, smaller pieces where the skyline is dense.
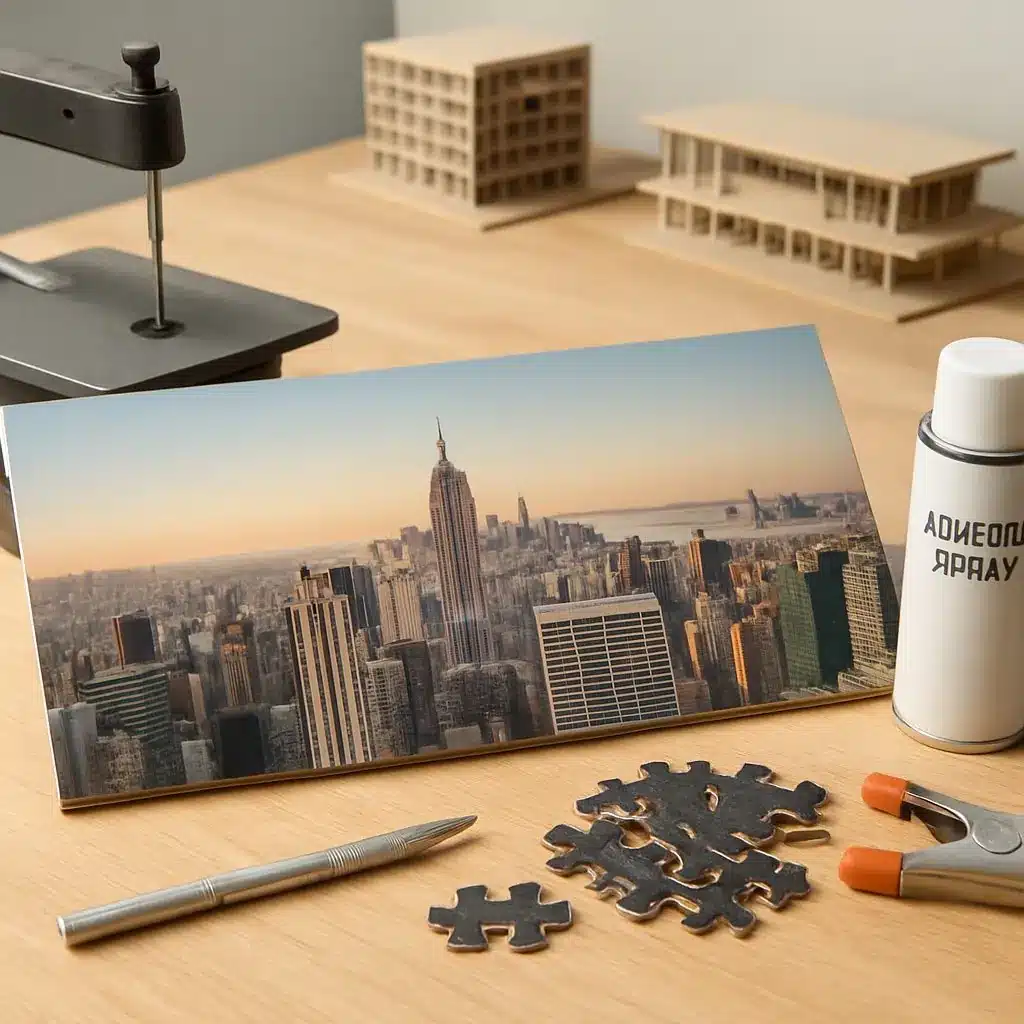
Step 5 — Cutting the puzzle
Choose a cutting method based on tools and desired finish:
- Craft knife and template: Use for small projects on thin chipboard. Score repeatedly and snap. Best for simple geometries.
- Scroll saw or fret saw: Good for intricate organic cuts on thicker wood or MDF. Clamp the board and cut slowly, following a drawn pattern.
- Laser cutter or CNC: Produces precise, interlocking pieces and is ideal for complex jigsaws. Use vectorized piece shapes and test cut on scrap first.
- Die cutting (commercial): For repeatable production runs — contact a local fabricator.
When cutting by hand, mark piece outlines on the back of the board to avoid damaging the printed surface. Keep a piece numbering or photo reference handy if you plan to package the puzzle assembled as a reference image.
Step 6 — Finishing and quality checks
- Sand any rough edges and remove dust.
- Test fit pieces to ensure snug but not overly tight tolerances.
- If pieces are too loose after cutting, add a thin strip of archival double-sided tape inside edges of troublesome pieces to increase friction.
Step 7 — Packaging and presentation
Decide whether to include a reference image in the box. Options:
- Full-size print of the original photo folded or rolled and inserted into the box.
- Smaller printed insert showing the completed puzzle (useful for challenging puzzles).
- Custom box or recycled wooden tray — add a label with title, dimensions, piece count, and a short story about the skyline.
Troubleshooting and tips
- If sky pieces are too uniform and frustrating, introduce subtle gradients or stickers on the back of selected pieces as assembly cues.
- For complex skylines, create zones (water, skyline, sky) and cut along zone borders first to reduce complexity.
- Keep a template of one interlocking piece as a master for consistent tab sizes when cutting by hand.
Safety and sustainability
Always use eye and hand protection when cutting. Work in a well-ventilated area when using sprays or varnishes. Reclaimed wood, recycled board, and archival water-based adhesives reduce environmental impact while producing durable results.
Creating a custom skyline puzzle from photos is a versatile project: scale the difficulty by changing piece count and cut style, or make a small batch for gifts. If you enjoyed the design decisions, check our collections for more composition ideas and skyline examples at inspiration from famous skylines.